Freightek is integrated with the E-INVOICE platform, allowing users to issue and manage electronic invoices quickly and efficiently.
After the customer has completed payment, the accounting team can issue the e-invoice as follows:
Step 1: Go to the list of invoices
Navigate to Accounting → Revenues and find the invoice with status "Not Issue".
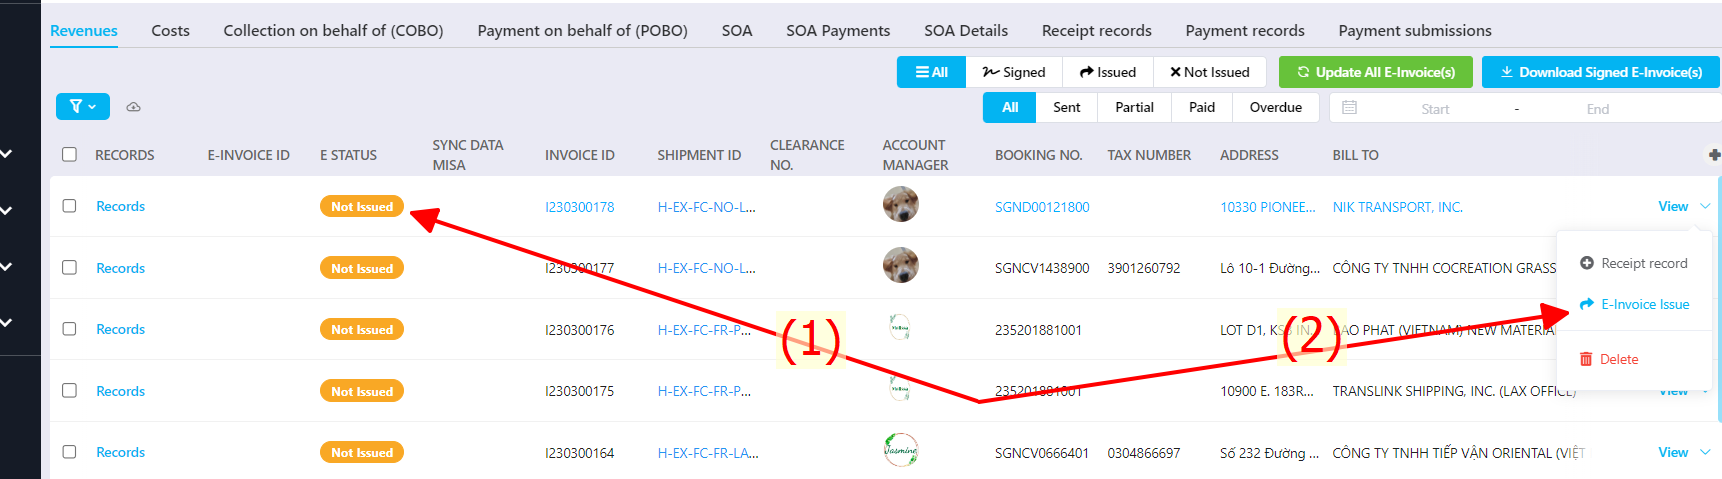
Click or hover over the arrow next to the View button → select E-invoice Issue to push data to the e-invoice software.

Ensure all required conditions for issuing the invoice are met.
Tick the checkboxes for any information you want to display on the e-invoice description.
Once selected, the system remembers your choices for future invoices—no need to redo.
Carefully read the notes to ensure data accuracy and safety.
Click View draft to preview the invoice before issuing.
Click Issue to send the data to the e-invoice system.
Click Cancel if you want to stop the issuing process.
Add additional notes (optional) on the issuing screen.
Step 2: Sign using USB Token
Filter invoices with status Issued in Freightek.

Select the invoice that needs to be digitally signed.
Step 3: Sync signed invoice data back to Freightek
Go to Accounting → Revenues and click Update All E-invoice(s) to sync the signed invoice number from EasyBooks back into Freightek.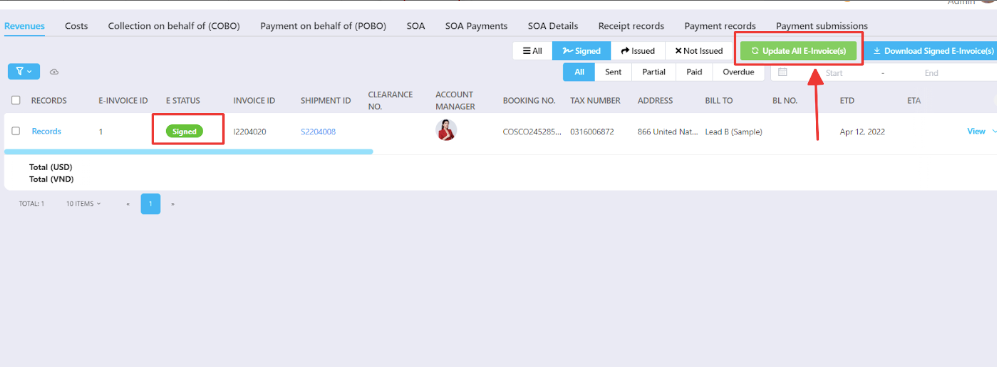
E-Invoice Status Filters
Signed: E-Invoices that have been digitally signed and approved by the tax authority.
Issued: Invoices that have been sent from Freightek to the iHoadon platform but not yet signed.
Not Issue: Original invoices created in Freightek that have not been pushed to the e-invoice system.
Was this article helpful?
That’s Great!
Thank you for your feedback
Sorry! We couldn't be helpful
Thank you for your feedback
Feedback sent
We appreciate your effort and will try to fix the article